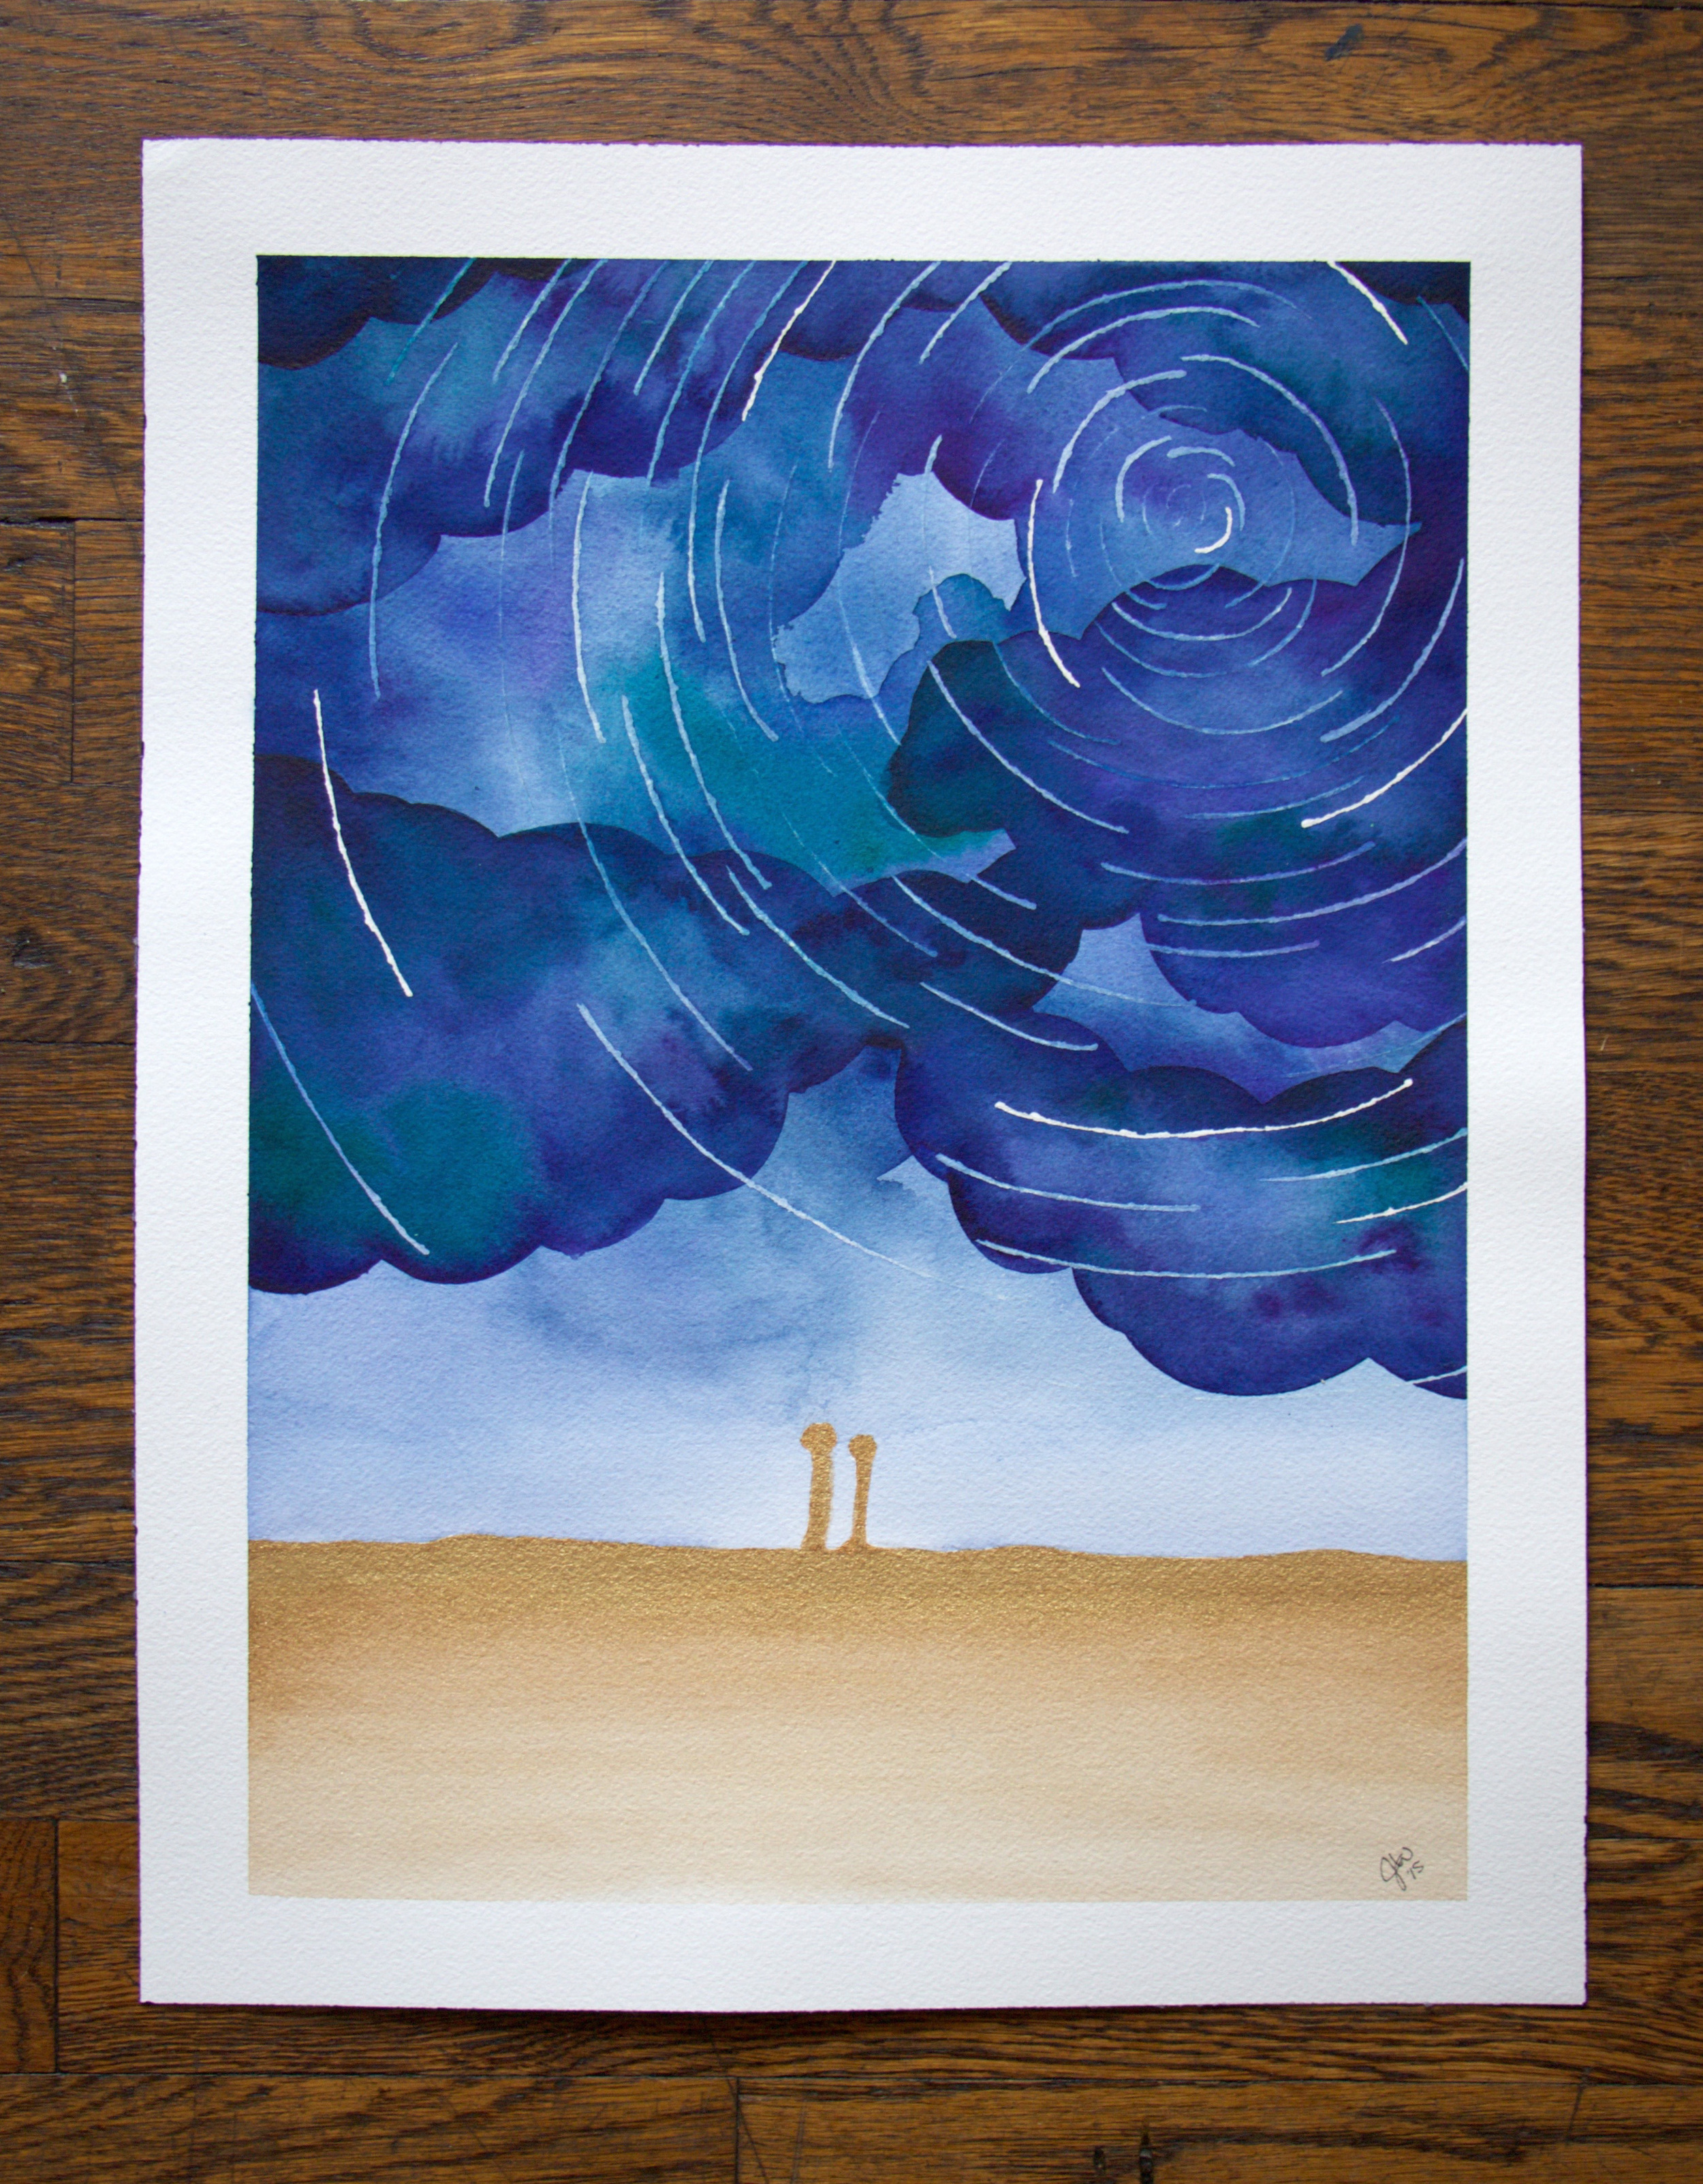
I love getting custom watercolor requests and an old friend recently asked me to create a custom painting based on a John Donne poem, "A Valediction: Forbidding Mourning." After reading the poem I was inspired to paint a dark, beautiful sky (think evening a storm is rolling in) overlaid with the image you get when you take a long shutter-speed photo of the stars, similar to the images below.
Nighttime thunderstorm inspiration.
Photo credit here.
Long exposure photograph of the night sky.
Photo credit here.
The final painting based on the poem is shown below. I've published a post dedicated to the creative process behind the painting but, for now, I'll just share a few tips about how to paint the sky I created.


You can take a look at this post (or scroll to the bottom of this post) for the materials I use. For this painting I also use masking fluid to create the stars in addition to the brushes and paints. Masking fluid is a tacky substance that protects your paper from paint. You can use it to preserve white areas that would otherwise be too tiny or complex to paint around. You can paint it on using a regular brush but make sure to rinse it quickly otherwise it has a tendency to ruin brushes because it dries to a rubber-y texture. I use an x-acto blade when I need thin lines and a brush when I'm painting larger areas. You can read this tutorial from The Postman's Knock Blog learn more about masking fluid.
Now, on to the fun part.
The first step to lightly draft the stars with a pencil. Start with a small cluster in the corner of your page and add longer lines getting farther apart as your expand the design outward. The goal of this painting is to layer the stars and clouds to create a balanced image. You can read more about the trial-and-error process I went through to come up with this method here. It was rough going at first!
Once you've sketched the lines, paint over a few of your "stars" with masking fluid. I pour masking fluid into a smaller container and dip my blade into that before I start laying it on the page. Since these stars will be the color of the paper and the brightest, only paint 3 or 4 with the fluid.
Let this masking fluid layer dry completely (it usually takes a few minutes) before adding any watercolor. The next step is adding the base layer of watercolor wash over the entire page. This will be the lightest layer so use more water than pigment during this step. I use a combination of Cotman watercolors including Prussian Blue, Ultramarine, Dioxazine Purple, and Viridian and a size 24 round brush for this painting.
Once this layer is dry repeat the masking fluid step on a few more stars and let dry. About half of the stars you drafted should be covered in masking fluid by this point.
Next, paint the first layer of clouds. Load your brush with a lot of pigment to make sure the colors are vibrant when they dry. I use a size 13 flat brush for this step and stick with the Cotman watercolors of Prussian Blue, Ultramarine, Dioxazine Purple, and Viridian. I usually cover approximately 40-50% of the page with this layer of clouds. The next layer will cover different areas of the page so I want to make sure I cover enough area with the current layer so I paint another layer and still see these bottom two layers. Paint the clouds with sharp, rounded edges and fill the entire cloud with color. This layer should be darker than the previous layer but we also want it lighter than the next layer. If you think this layer is too dark after you paint it then take a dry paper towel and dab some of the color off the page until you get the desired tone.
Next, add a final layer of masking fluid and paint the rest of the stars you sketched at the beginning of the tutorial. These stars will be the darkest since there are two layers of paint beneath them.
Once this layer is dry paint a final layer of clouds. Fill your brush with as much pigment as you can to make sure this is the darkest layer on the page. This layer should overlap the previous two in such a way that all the layers are visible once you finish painting.
Let this final layer dry completely then use tweezers to remove the lines of masking fluid. Remove the masking fluid carefully to make sure you don't pull paper up with your tweezers!
And there you have it! Enjoy your beautiful watercolor night sky. If you're like me, you might need a few tries before getting the technique and composition figured out. Don't worry and keep trying! If you want more information on the process I went through to create this final image and the poem it is inspired from, you can read a post dedicated to the design process here.
If you have any questions shoot me an email at paperbyjlee@gmail.com.
Have fun watercoloring!
Jennifer
